“Zero your rifle the right way.”
If you’re serious about precision shooting, hunting, or competitive marksmanship, one of the most important foundational steps is learning how to zero your rifle the right way. Whether you’re setting up a brand-new optic or re-zeroing after a major change to your rifle, the way you establish that point of aim to point of impact relationship will directly impact your accuracy at every distance.
In this in-depth guide, we’ll walk you through exactly how to zero your rifle properly. You’ll learn what zeroing is, the best distances for different use cases, how to get on paper quickly, and how to lock in a repeatable zero, complete with pro tips for dialing in with precision.
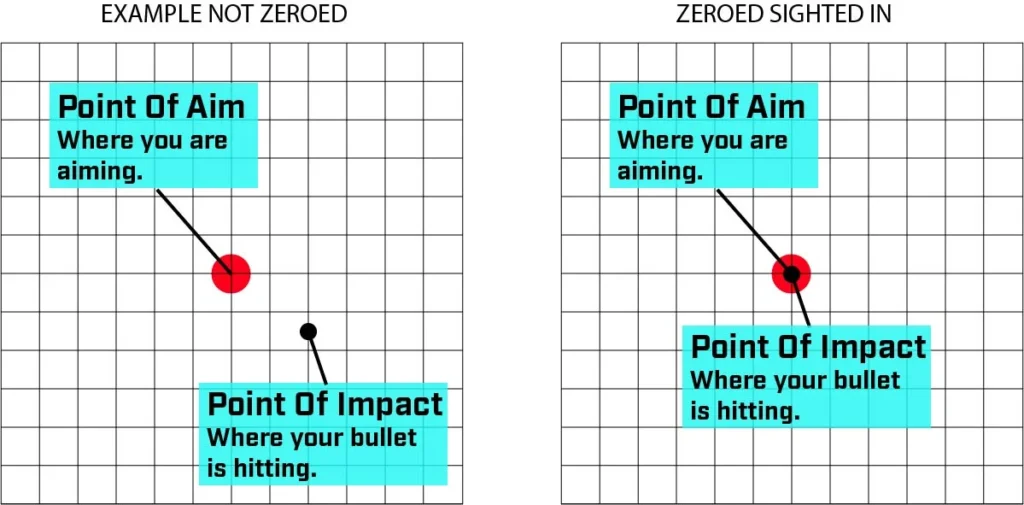
What Does It Mean to Zero a Rifle?
To zero a rifle means to align your scope or optic so that your point of aim (where you’re aiming) equals your point of impact (where the bullet actually hits) at a specific distance.
Your zero becomes the foundation for your ballistic calculations. All your dope (data on previous engagements), elevation adjustments, and wind holds will build off this zero. If it’s off, everything else is off.
Why Zeroing Properly Matters
Many shooters believe they’ve zeroed their rifle just because they’re “close enough” at 100 yards. But if you don’t zero with intention and precision, small errors at 100 yards can become massive misses at 500 yards or beyond.
Whether you’re a weekend hunter, PRS competitor, or defensive shooter, a true zero will:
- Maximize accuracy at known distances
- Ensure consistent performance across varying conditions
- Give you confidence in your rifle’s performance
- Save time and ammo on the range
What Distance Should You Zero At?
There’s no universal best distance to zero at. It depends on your rifle’s purpose.
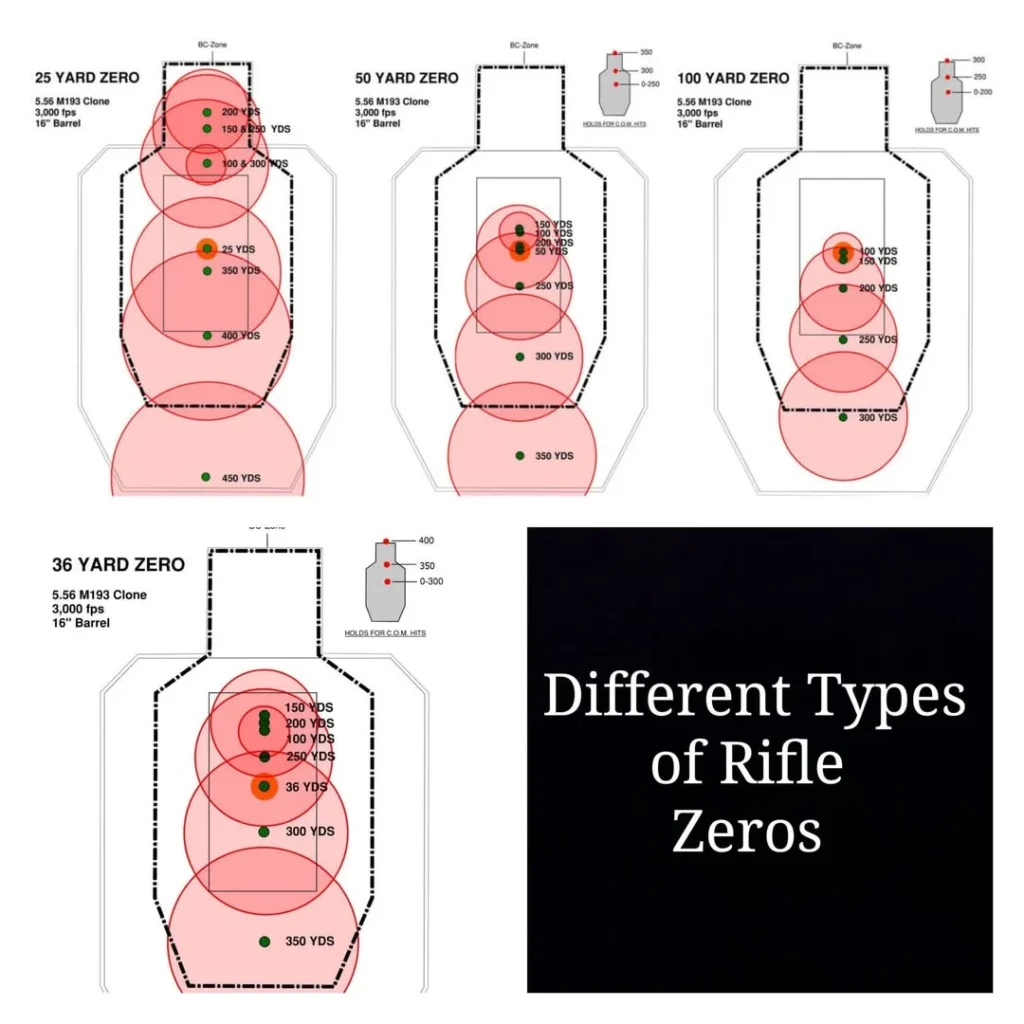
🔹 100-Yard Zero
This is the standard for most precision rifles and hunting setups. It provides a consistent baseline for calculating drop and windage at extended distances. It’s also the most common zero distance for competitive shooters.
🔹 50-Yard Zero
Useful for AR platforms and defensive rifles. A 50-yard zero often results in a second impact zero around 200 yards (depending on caliber), making it versatile for close to mid-range shooting.
🔹 36-Yard Zero – my prefered for ARs
Popular among .223 shooters using red dots or LPVOs. Offers minimal rise/drop out to about 300 yards, ideal for center-mass targeting in dynamic situations.
🔹 25-Yard Zero
Used for initial sight-ins or close-range carbines, but this can result in exaggerated drop/rise at further distances. It’s typically a starting point before fine-tuning at longer range.
Pro Tip: If you’re shooting long range (500+ yards), always zero at 100 yards with match-grade ammo, under stable environmental conditions.
Gear You’ll Need to Zero Properly
Before you get started, make sure you have the right gear:
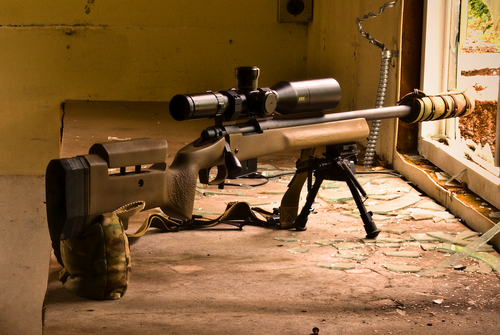
- A quality rifle and optic setup
- A solid shooting bench or prone on a shooting mat
- Bipod or front rest + rear bag (or a sled)
- Paper targets with 1-inch grid or bullseye
- MOA or MIL-based reticle scope (with adjustable turrets)
- Torque wrench and tools (if adjustments needed)
- Ballistic calculator or chart (optional but helpful)
- A spotting scope or shooting buddy (to observe hits)
Step-by-Step Guide: How to Zero Your Rifle
Step 1: Bore Sight Your Rifle
If this is a new setup or a freshly mounted scope, start by bore sighting:
- Remove the bolt (bolt-action rifles)
- Place the rifle on sandbags or a rest and look down the bore at a distant object or the target
- Without moving the rifle, adjust the scope’s turrets so the reticle aligns with the object/target
- This gets you “on paper” at 25–50 yards and saves ammo
Alternative: Use a laser bore sighting tool for faster alignment.

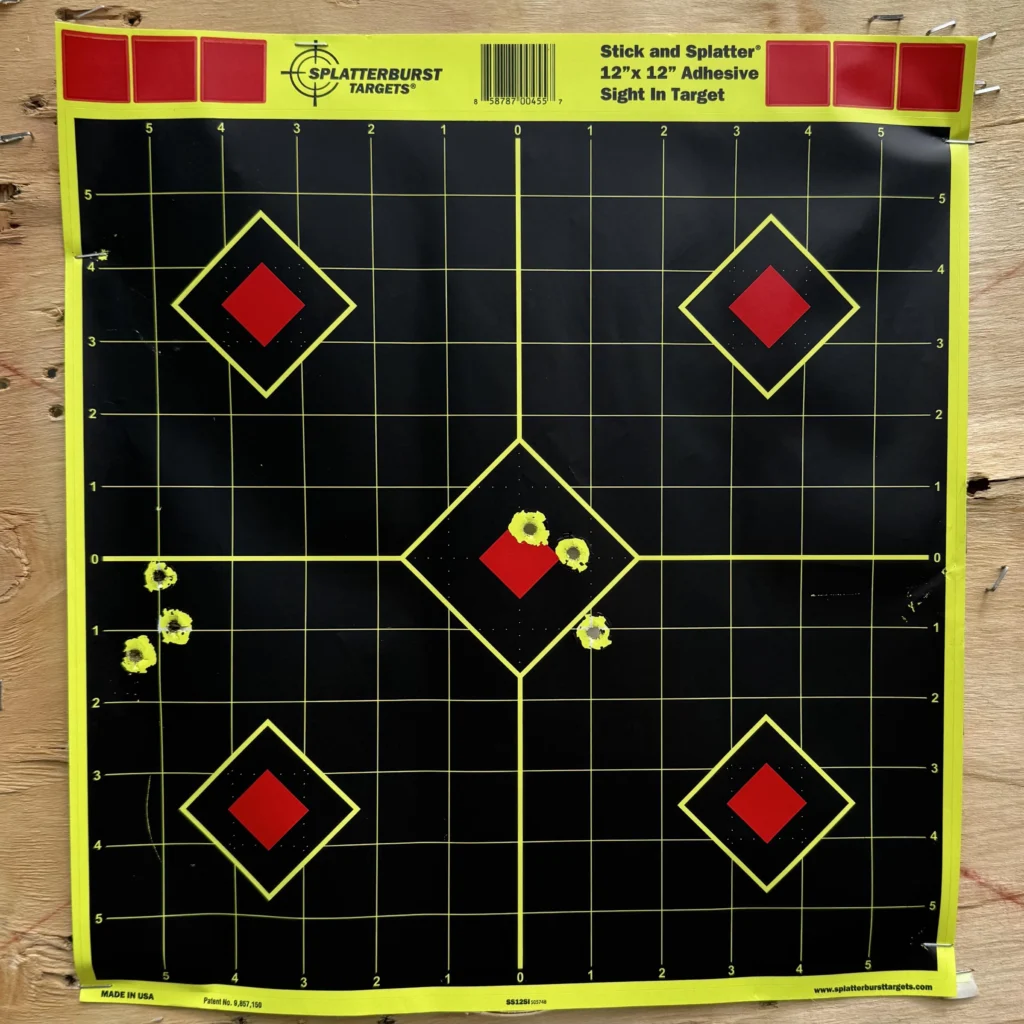
Step 2: Fire a 3-Shot Group at 25 or 50 Yards
Move to 25 or 50 yards and fire a 3-shot group. Don’t worry about hitting the bullseye, just see where the rounds are grouping. Grouping is more important at this point. This shows where you are hitting compared to where you are aiming.
- Keep the same point of aim for each shot
- Don’t move your head or body between shots
- Measure the distance from the center of the group to the center of the target
- Use your scope’s turret adjustments to move the reticle accordingly
Example (MOA scopes):
If your group is 2 inches low and 1 inch right at 25 yards, you’ll dial up 8 clicks (2 MOA) and left 4 clicks (1 MOA), since each click is typically ¼ MOA.
Note: At 25 yards, scope adjustments are magnified 4x (¼ MOA = ~0.06″ at 25 yds), so make fine adjustments.
Step 3: Move to 100 Yards and Fire Another 3-Shot Group
After bore sighting and preliminary zeroing at 25–50 yards, it’s time to finalize your zero at 100 yards.
- Use the same point of aim
- Fire a tight 3- to 5-shot group
- Measure vertical and horizontal offset from center
- Adjust turrets to shift your group to the bullseye
Tip: Always adjust to where the group hits, not where a single bullet lands.
Step 4: Confirm and Refine Your Zero
Fire another group after your adjustments to confirm your point of impact. The goal is to have a group centered on the bullseye.
If you’re satisfied:
- Lock your turret caps (if applicable)
- Record your zero information (ammo type, conditions, date)
- Save your ballistic data (drop charts, apps, DOPE stickers)
Step 5: Check for Consistency
Before leaving the range:
- Shoot a few more groups to confirm repeatability
- Try some positional shots (prone, off barricade) to see if your zero shifts
- Confirm scope mount torque is still secure
- If you have a suppressor, check your POI shift with/without it
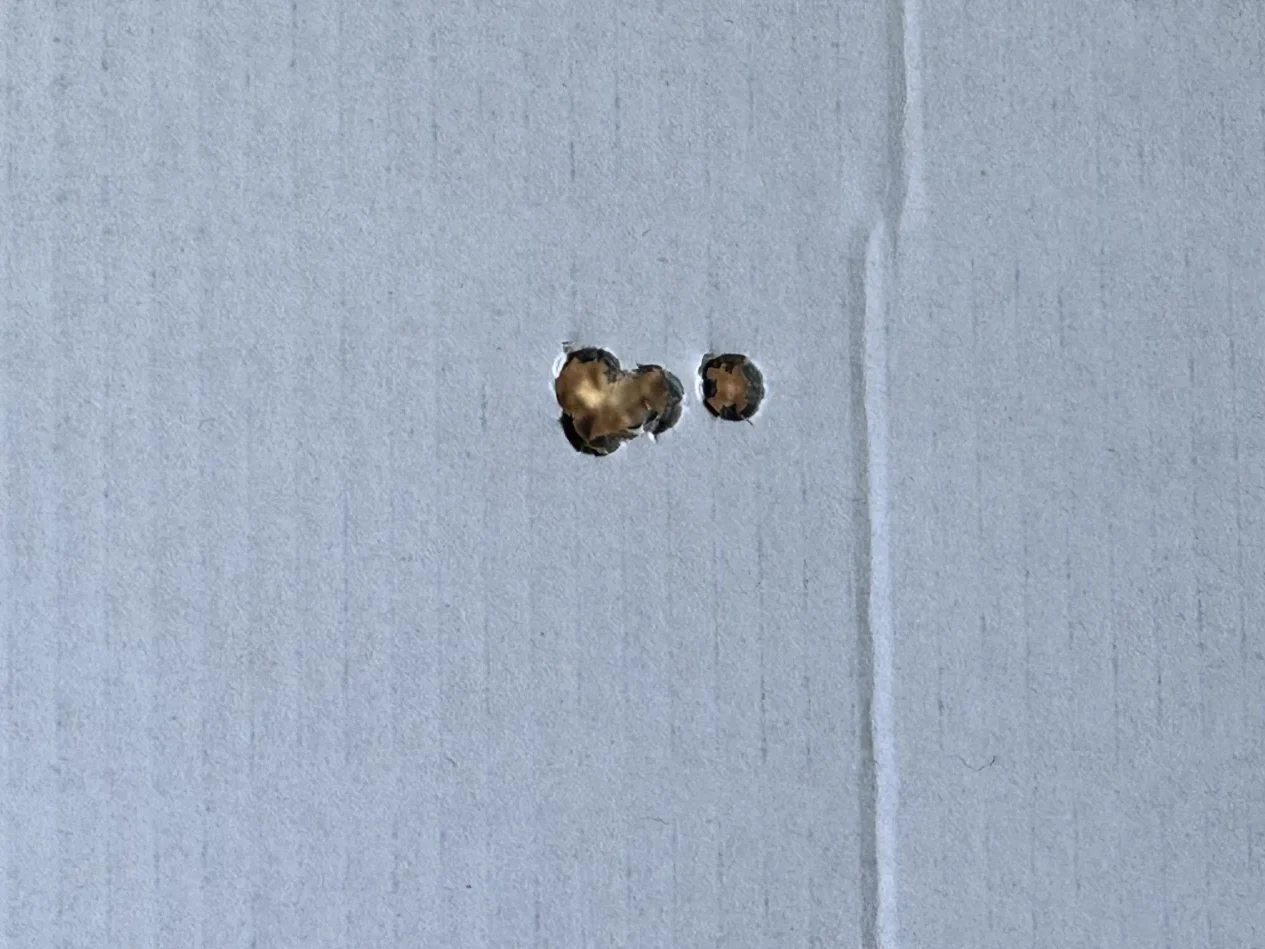
The goal is to get small groups. But don’t be discouraged, this will come with range time.
Tips for Better Zeroing
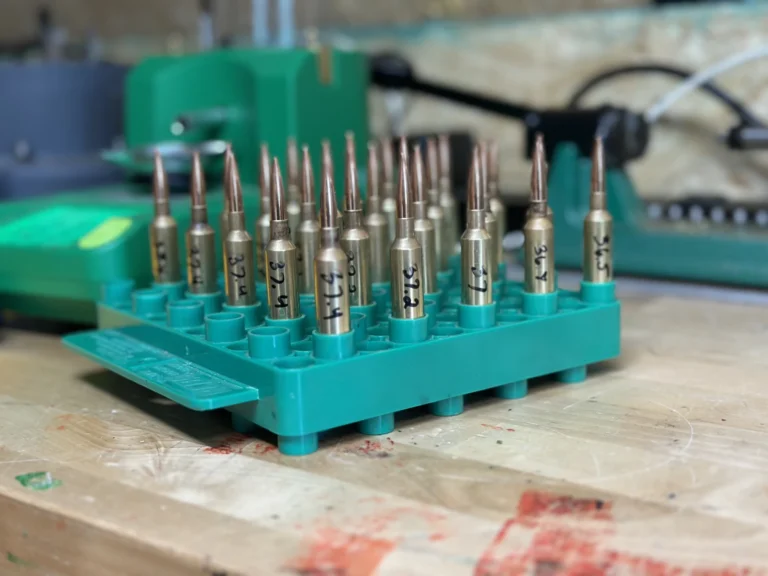
✅ Use match-grade or hunting ammo you’ll actually shoot with
Zeroing with bulk ammo and switching to premium later can ruin your accuracy and your zero. Different ammo will group differently.
✅ Let your barrel cool between groups
Heat affects the point of impact and group size.
✅ Avoid chasing every shot
Always adjust based on a consistent group average, not a flyer.
✅ Use a rear bag or support
Eliminates human error and helps you apply fundamentals like natural point of aim.
✅ Record weather conditions
Temperature, humidity, and elevation all impact bullet trajectory. Use a ballistic app to account for them.
✅ Print a custom target
Targets with 1” grids or smaller, or scope calibration marks, help you make precise corrections.
What Happens After You Zero?
Once your rifle is zeroed, it becomes your reference point for all future adjustments. Every elevation dial and wind hold builds off that zero.
Want to shoot 600, 800, or 1,000 yards? Your ballistic data is only as good as your zero. Want to compete in PRS or drop an elk with a single ethical shot? It all starts here.
Your ballistic data is only as good as your zero.
Final Thoughts
Zeroing your rifle is not just a check-the-box deal. It’s a critical skill that every shooter should master. With the right process, patience, and precision, you can trust your rifle to hit exactly where you intend every time.
Whether you’re tuning up for hunting season, preparing for a shooting match, or building your first long-range rig, take the time to zero your rifle the right way. It’s the first step toward becoming a confident and capable marksman.
Want Hands-On Help?
Join us at Precision Gunworks LLC for our Intro to Long-Range Shooting course, where we’ll walk you through zeroing, ballistic data, and real-world shooting positions. Let’s get you dialed in and ready for whatever’s downrange.
About the Author
Mark DeHart is a seasoned precision shooting instructor and firearms expert with over a decade of experience in long range marksmanship, competitive shooting, and tactical firearms training in and outside of the military. Founder of Precision Gunworks LLC, Mark specializes in helping new and intermediate shooters develop practical skills—whether it’s wind calling, ballistic calculations, or bag setup—through one‑on‑one coaching and structured course programs. A firm believer that consistency trumps gear, Mark’s teaching philosophy focuses on fundamentals, repeatability, and real‑world application to help marksmen take their accuracy to the next level.